Lead times
Tier 1. Lead times tell shoppers how long a piece takes to make and ship, for example "Made to order, 6–8 weeks". Weft shows the lead time of the selected variant and updates it when the shopper changes size or fabric.
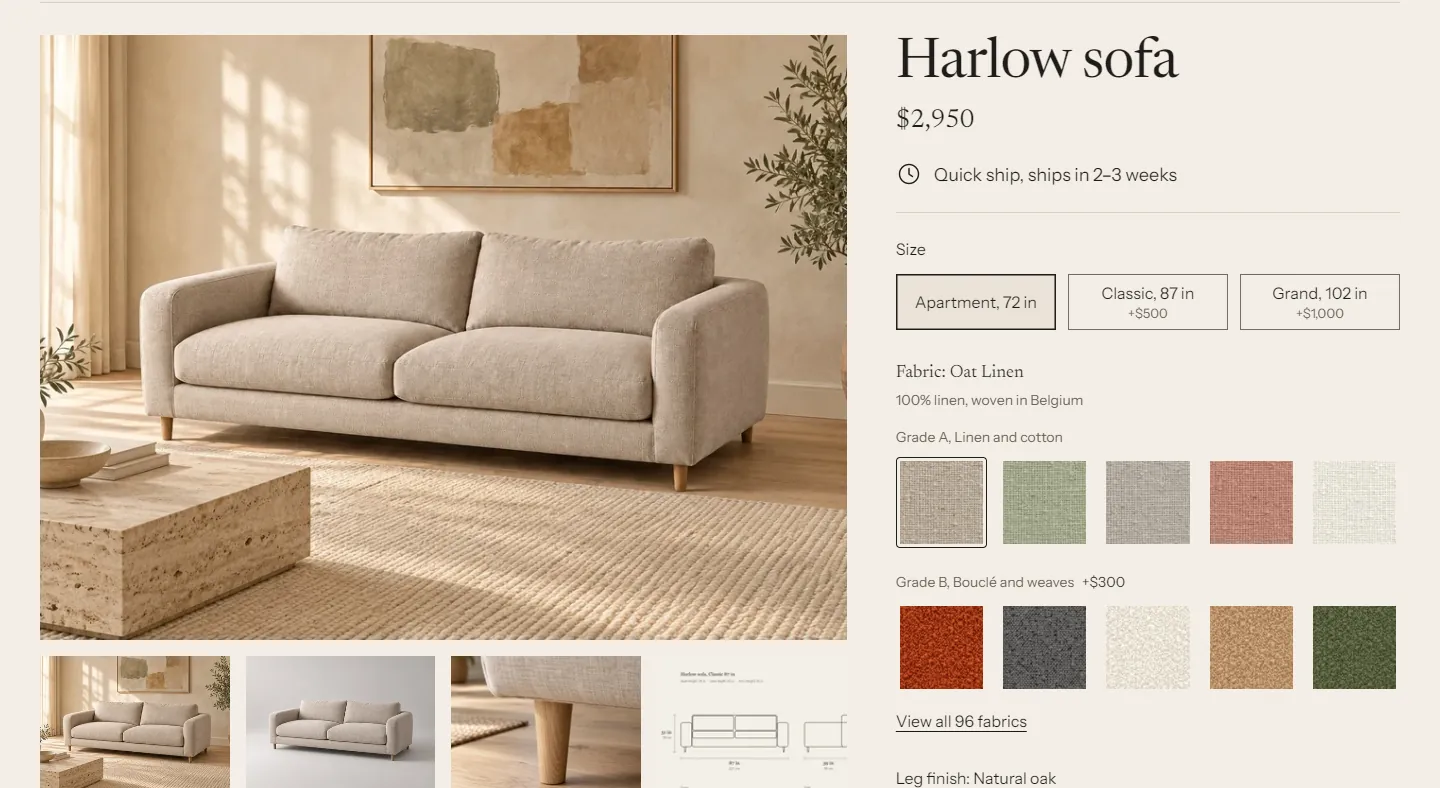
Where lead times show #
| Place | What it shows | Setting |
|---|---|---|
| Product page, Lead time block | The label, for example "Made to order, 6–8 weeks". Optional estimated ship dates and note | Lead time block |
| Sticky add to cart bar | "Ships in 6–8 weeks" | Sticky add to cart block: Show lead time |
| Product cards | The lead time label of the variant the product page opens on | Theme settings > Product cards > Show lead time |
| Cart drawer and cart page, per line | "Ships in 6–8 weeks", worked out again on every cart view | Always on |
| Cart summary | "Longest lead time: 10–12 weeks" | Cart section: Show the longest lead time. Cart drawer: Theme settings > Cart > Show the longest lead time in the cart drawer |
| Order in your admin and at checkout | Line item property "Lead time: 6–8 weeks" | Theme settings > Lead times > Save lead time on the order |
| Order in your admin | Cart attribute "Longest lead time" | Theme settings > Lead times > Save the longest lead time on the order |
| Order confirmation email | Both of the above | Needs the email snippet |
Resolution order #
For the selected variant, Weft uses the first lead time it finds, in this order:
- The variant's
custom.lead_timemetafield. - The selected fabric's Lead time field (tier 2).
- The Lead time field of that fabric's grade (tier 2).
- The product's
custom.lead_timemetafield. - Theme settings > Lead times > Default lead time.
Examples:
- Most of your sofas take 6 to 8 weeks, velvets take 10 to 12. Set the product to "Standard, 6–8 weeks" and the velvet grade to "Special order, 10–12 weeks". Picking a velvet switches the lead time.
- One fabric is in stock and ships faster. Give that fabric "Quick ship, 2–3 weeks". It overrides its grade.
- The corner version of a sofa takes longer. Set the corner variants' metafield. It overrides everything else.
Product cards use the same order for the variant the product page opens on: the selected or first available variant, with its fabric. A card and the product page it links to always agree. Cards show the default lead time (step 5) only if you turn on Use the default lead time when none is set.
Set up lead times #
1. Create the Lead time metaobject definition #
- In your admin, go to Settings > Metafields and metaobjects.
- Under metaobject definitions, click Add definition.
- Name:
Lead time. Check that the type below the name readslead_time. Click Add field four times and add these fields:
Field name Type Key Label Single line text, one value. Tick Required labelMin weeks Integer min_weeksMax weeks Integer max_weeksNote Multi-line text note- Check that Label is the display name. Shopify uses the first text field unless you change it.
- Under Access, tick Storefronts.
- Click Save.
2. Create the two metafield definitions #
- Go to Settings > Metafields and metaobjects > Products and click Add definition.
- Name:
Lead time. Namespace and key:custom.lead_time. - Click Select type, choose Metaobject, keep One entry, and pick the Lead time definition.
- Under Access, tick Storefronts. Click Save.
- Go back, click Variants, and create the same definition there: name
Lead time, keycustom.lead_time, Metaobject, one entry, Lead time.
3. Add lead time entries #
- Go to Content > Metaobjects > Lead time and click Add entry.
Fill in the fields, for example:
Label Min weeks Max weeks Note In stock, ships in 1–2 weeks 1 2 Made to order, 6–8 weeks 6 8 Built by hand in our workshop after you order. Special order, 10–12 weeks 10 12 Velvets and leathers are cut to order. - Click Save. Two to five entries are usually enough. When your workshop gets busier, edit one entry and every product using it changes.
4. Give products a lead time #
- Open a product in Products.
- In the Metafields card, click Lead time and choose an entry.
- Click Save.
To change many products at once, select them in the product list, click Bulk edit, and add the Lead time column. For fabrics and grades, see fabrics.
Theme settings #
In the theme editor, open Theme settings > Lead times:
- Default lead time: used when a product, fabric or variant has no lead time. It's plain text. The default is "Made to order"; you can add a time, for example "Made to order. Ships in 8–10 weeks". To hide lead times on a product template entirely, remove the Lead time block there.
- Save lead time on the order:
- Visible at checkout (Lead time): the shopper sees "Lead time: 6–8 weeks" under the item at checkout, and it's on the order.
- Admin only (_lead_time): saved on the order but hidden at checkout. You see it in the admin.
- Don't save: nothing is added to the order.
- Save the longest lead time on the order: adds a "Longest lead time" cart attribute. It shows under Additional details on the order in your admin.
Lead time block settings #
On the product page, click the Lead time block in the Product section:
- Show estimated ship dates: adds "Estimated to ship Nov 20 to Dec 4", counted from today using Min weeks and Max weeks. It doesn't account for holidays or your cut-off time, so treat it as a rough guide. Off by default.
- Show the lead time note: shows the entry's Note under the label.
- Rule below: a thin line under the block.
Troubleshooting #
- The product page shows the default text instead of my lead time. Check that the Lead time definition has Storefronts access, and that the metafield on the product points to an entry.
- The cart says "Ships in 6–8 weeks" but the order says something else. The cart works out the lead time again on every view. The order keeps the value saved when the item was added to the cart. If you changed a lead time in between, they differ.
- The cart shows a long sentence instead of "Ships in 6–8 weeks". The entry has no Min weeks and Max weeks, so the theme uses the label.